Login with Facebook
Connecting Facebook to AuthRocket allows your users to login to your app using their Facebook login. It’ll take just a few minutes in your browser, and takes no coding at all.
This guide assumes that logins are already working in your app.
If not, we recommend doing that first (even if you don’t intend to use password-based logins in production). This is because social logins and password logins function identically as far as your app is concerned.
1. Add Facebook to AuthRocket
Start by going to Realm -> Settings -> Authentication -> Facebook.
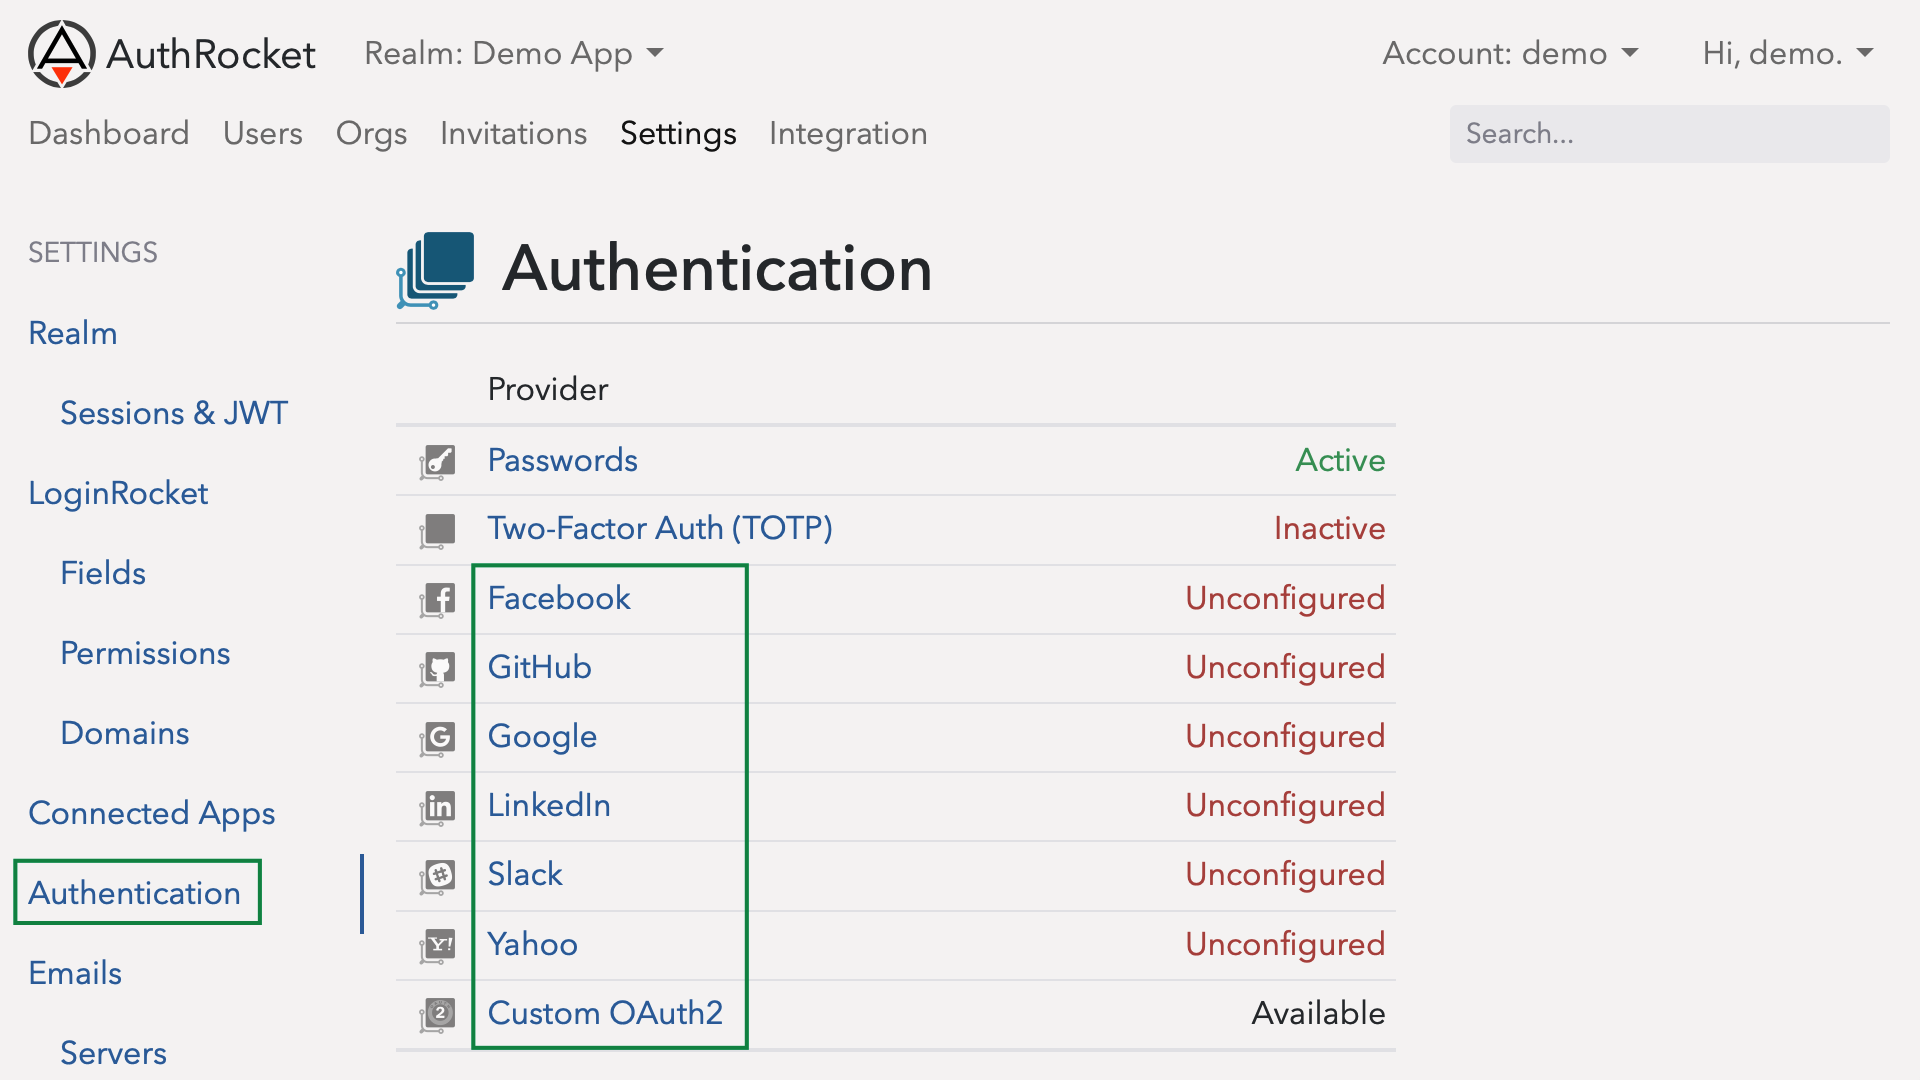
Leave this here. Next we’re going to tell Facebook about your app and we’ll need to add the Redirect URIs from this page into the Facebook App configuration. We’ll come back to this page to fill in the rest of the fields in a moment.
2. Create an App within Facebook
Open another browser tab to Facebook’s app configuration and login. If you haven’t previously registered as a Facebook developer, do that first.
Then, click on Create a New App. If asked what platform or type of app, click on Advanced setup.

Fill in your app’s name or domain name, select a category, and click ‘Create App ID’.
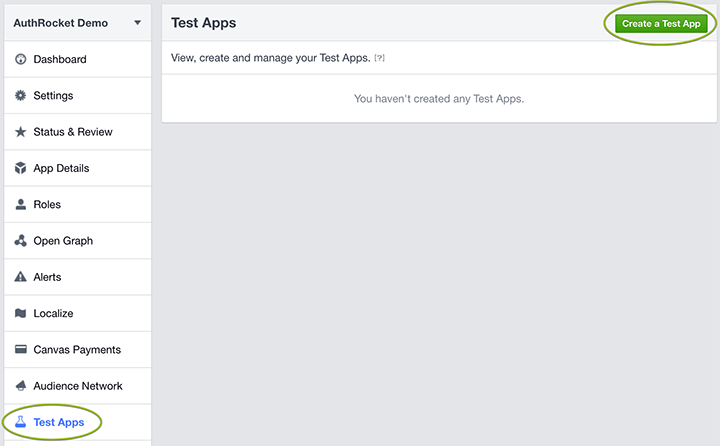
If this is a development / sandbox account, you’ll probably want to create a Test App. Do this by clicking Test Apps, Create a Test App, and Create Test App.
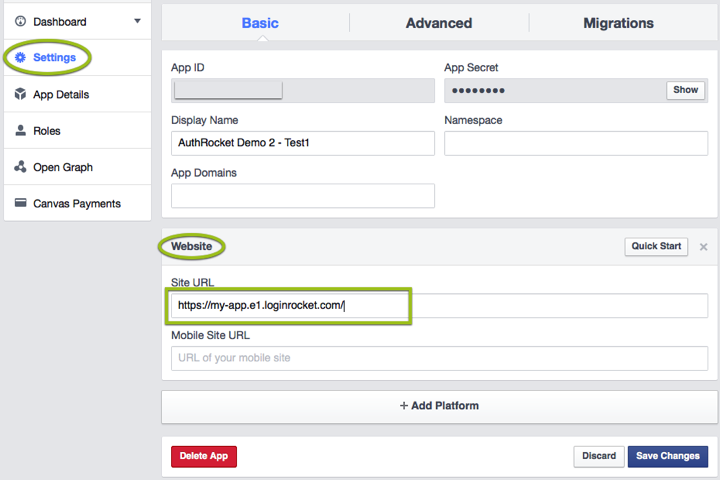
Next, click on Settings (either for your production app, or test app if you just created one).
Unless you already have a “Website” section (with a Site URL field), click on “Add Platform” near the bottom and then select Website.
Copy and paste the Site URL from AuthRocket (where we ended at step 1) in the Site URL field. If AuthRocket also displays App Domains, then copy that too (but don’t worry about it if it’s not present in AuthRocket).
Save changes and then click on the Advanced tab.
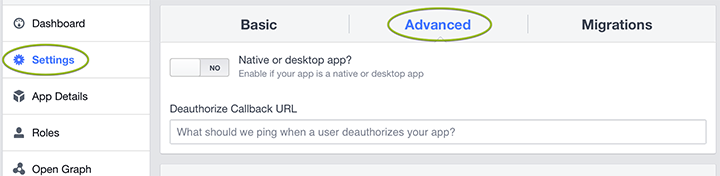
Scroll down until you find Valid OAuth redirect URIs.
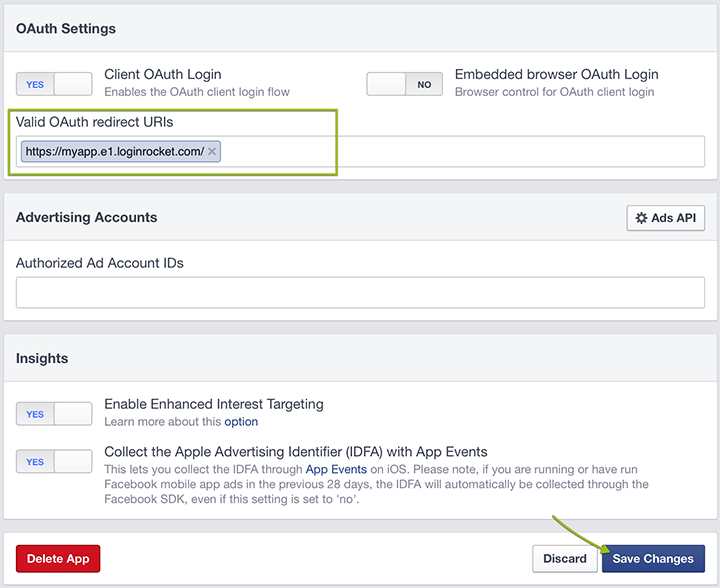
Copy and paste the Redirect URI from AuthRocket into the Valid OAuth redirect URIs field. (If you have more than one Redirect URI in AuthRocket, copy each one into Facebook).
Scroll to the bottom and click Save Changes.
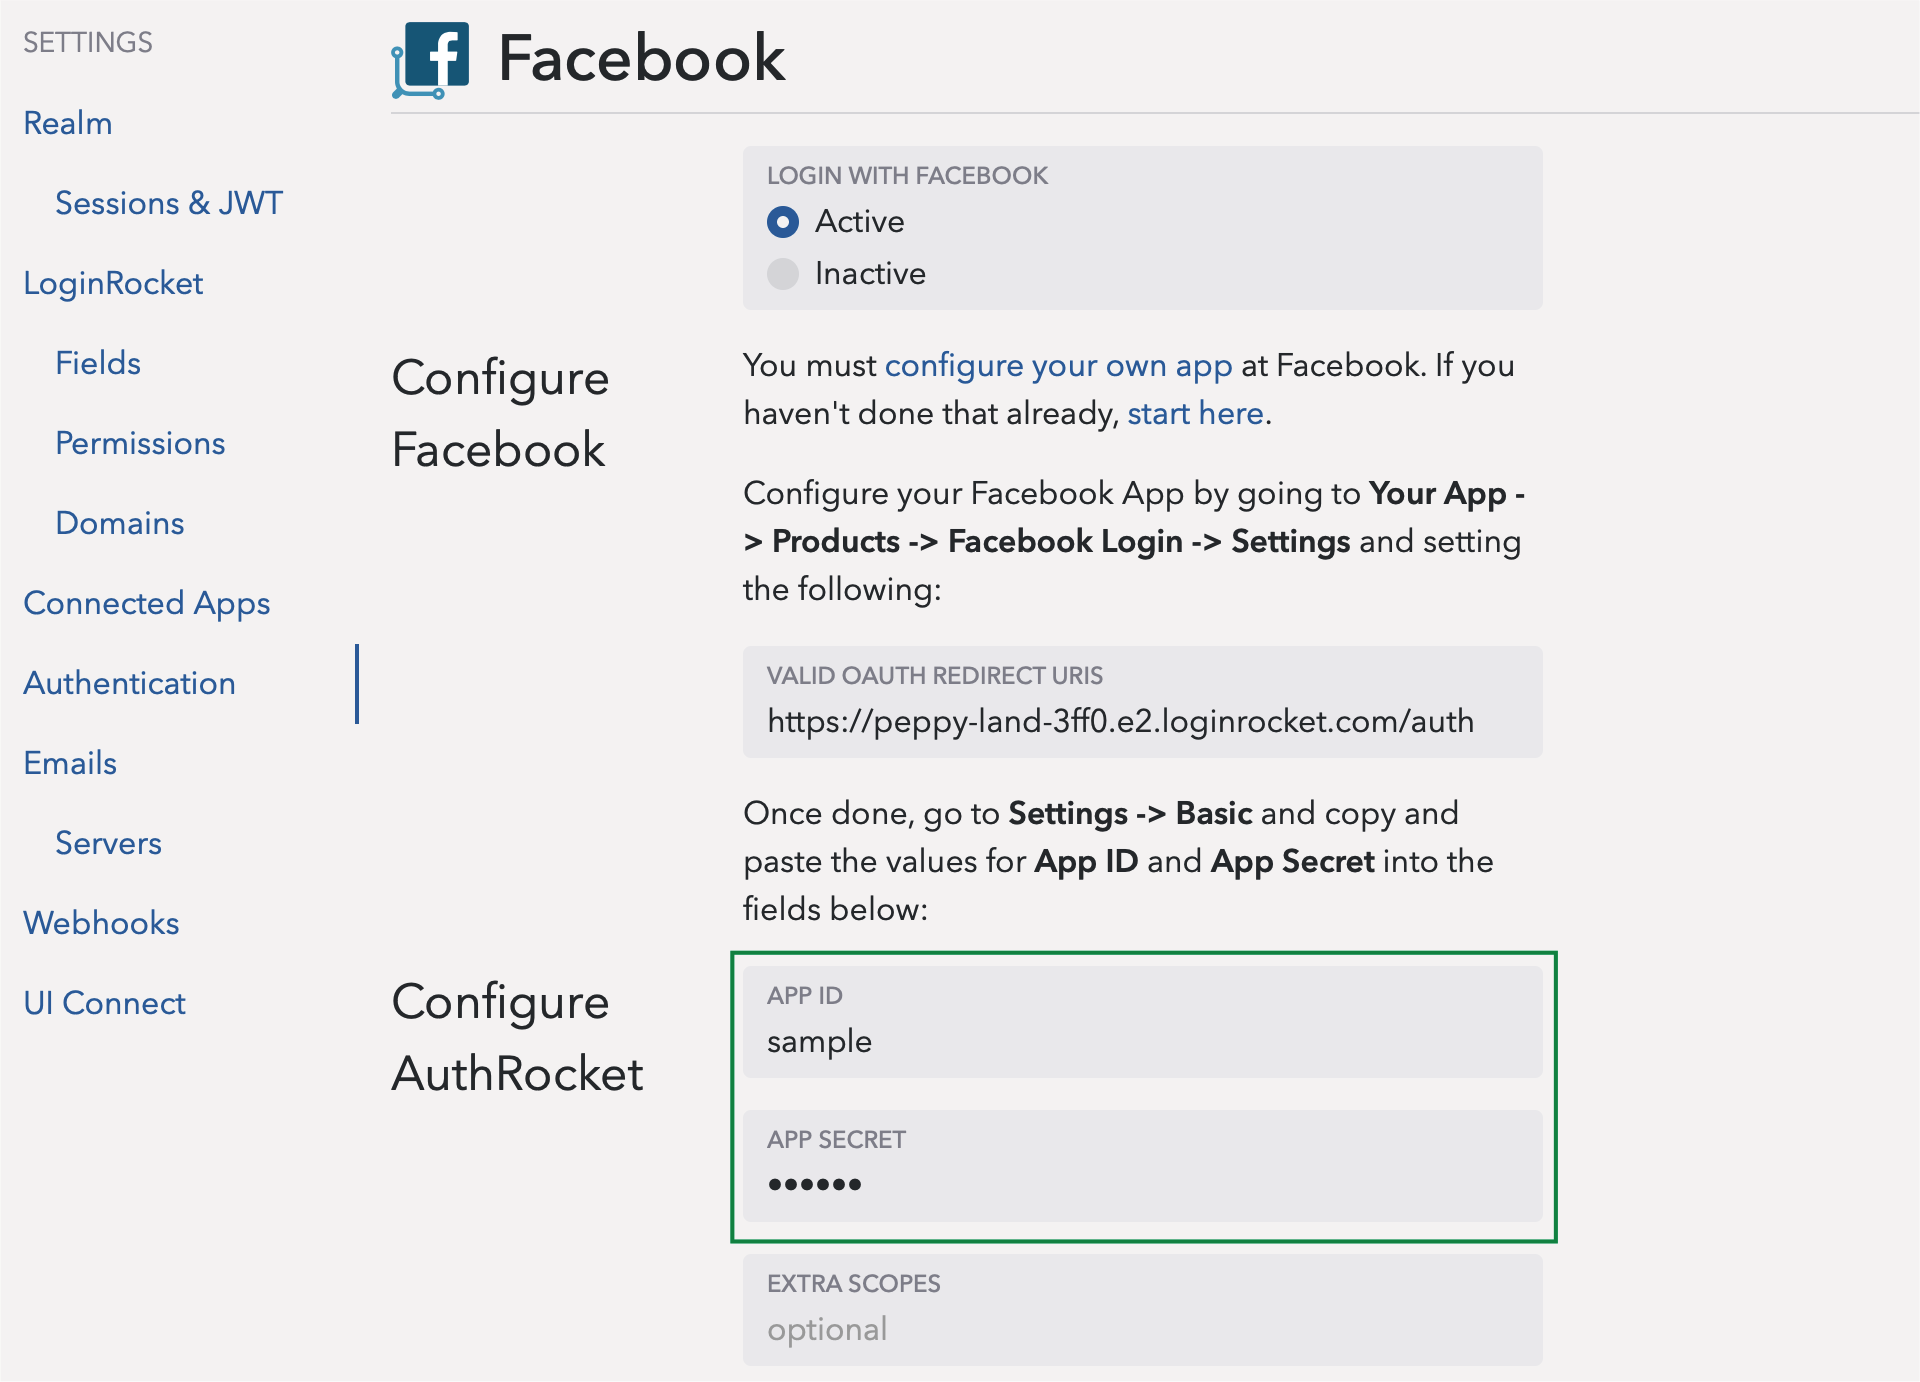
3. Tell AuthRocket about your Facebook App
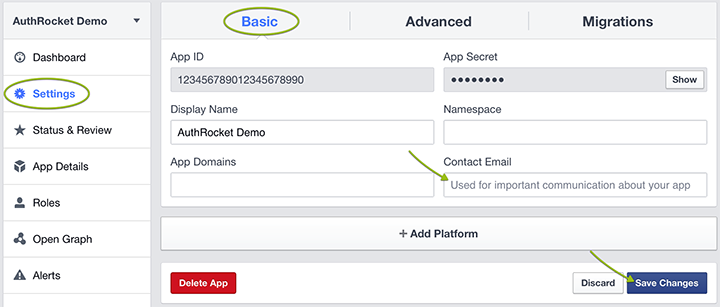
Still within Facebook, click back to the Basic tab. Click on the Show button next to App Secret.
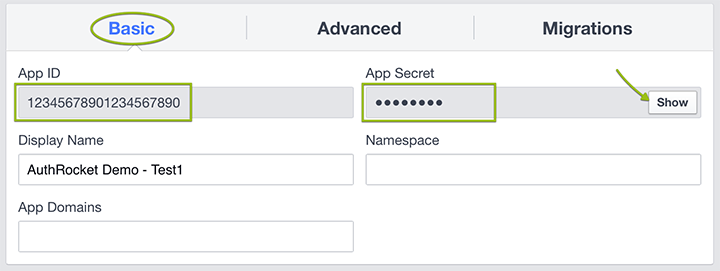
Now copy and paste the App ID and the App Secret into their matched fields back in AuthRocket (same page where we left off). Click Add.
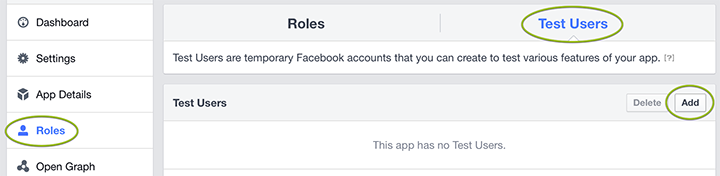
4. Test it out
Facebook allows you to create special test users to check everything. To do that, go to Roles on the left, Test Users, and click Add. Finally, select a number of users to create and click Create Test Users.
Alternatively, you can add users to the Testers group at Roles -> Add Testers or just enable the app for production (see next step).
Go to your LoginRocket page and you should see Login with Facebook. Click it, login to Facebook, and allow the login. If your app already accepts logins, you should be logged in. Even if not, you should see the new user under Users in AuthRocket.
5. Final steps
To use Facebook logins live, you must move your Facebook app to production mode. You’ll need to add a contact email first. In your production (not test) app, go to Settings again. Fill in the email and save.
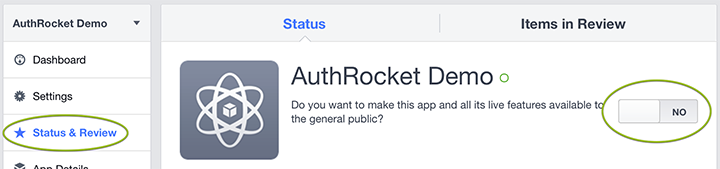
Finally, go to Status & Review and click On.
You may also want to upload your app’s logo to Facebook so Facebook can display it on the login authorization page (under App Details).
Congratulations, you’re done adding Facebook logins to your app!