Integration Guide
This guide shows you how to integrate AuthRocket with your app by using LoginRocket.
Using Node.js, PHP, or Ruby? We have specific guides just for those. See the menu to the leftabove.
You need to have already created a Realm for your app. If that’s not done yet, do that now or see Your first realm.
Get your LoginRocket credentials
In the AuthRocket management portal, go to Realm -> Integration -> Using LoginRocket, and then select Other (Backend).
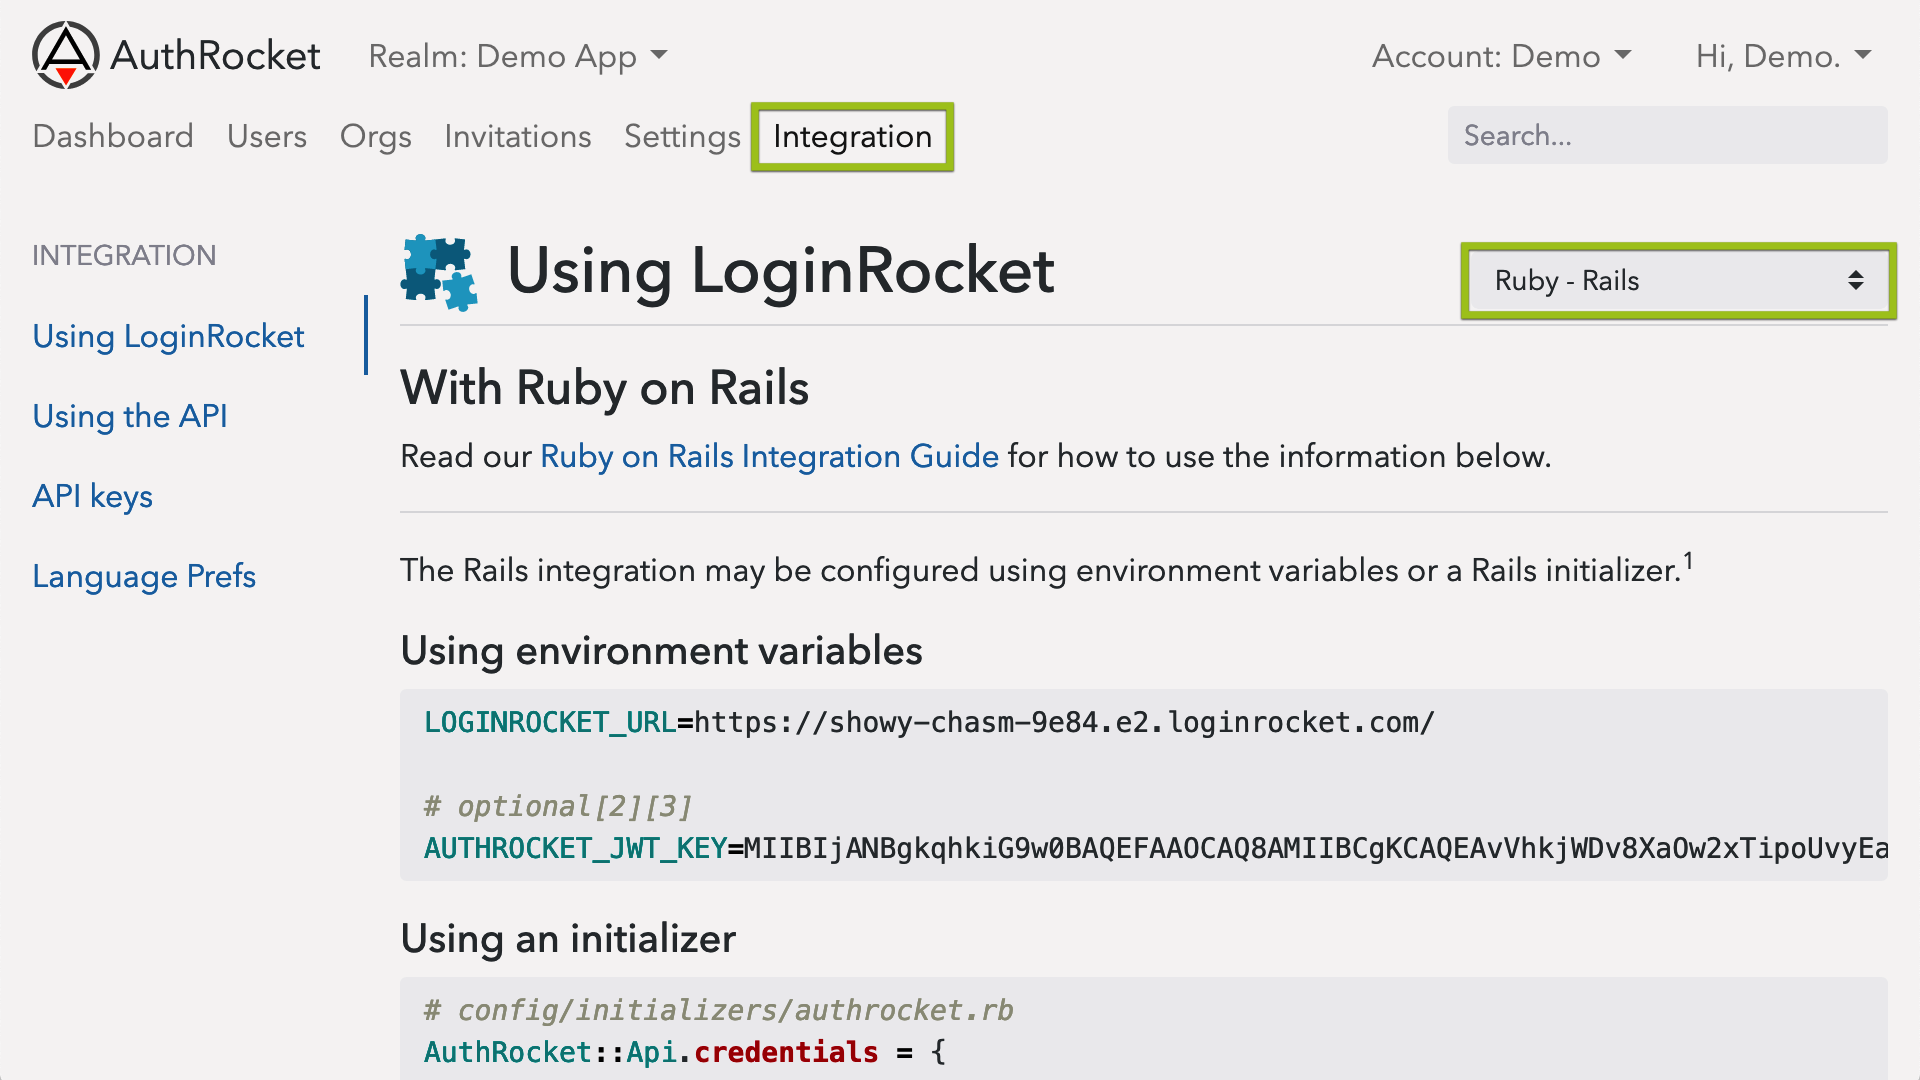
Use the JWT key for verifying login tokens.
Use the LoginRocket URL for redirecting users to LoginRocket so they can login, signup, manage their profile, etc.
Both of these are discussed more below.
Login tokens
LoginRocket will send login tokens to your app using the parameter ?token=[the-token]. These tokens need to be decoded and verified.
AuthRocket’s tokens are signed JWTs (aka JWS tokens). The embedded data (‘claims’ in JWT terminology) are OpenID Connect compatible.
You may use any JWT library available for your language to process these tokens. AuthRocket uses RS256 signatures by default, which should be near universally supported.
Here’s some pseudo-code showing how to verify and use AuthRocket’s login tokens:
## /login page

# store the token in a session/cookie for use on each page
token = request.get_param('token')
if (token) {
  session['token'] = token
}
redirect user to main page


## on each page requiring user to be logged in

# your JWT key could be stored in an environment variable, in Vault,
#   or in a constant set during your app's initialization process
jwt_key = "...YOUR_KEY_HERE..."

# decode & verify the token
jwt = JwtLibrary.verify_jwt(session['token'], jwt_key, algorithm: 'RS256')
# if invalid, assuming returns null
#   some libraries may throw an exception instead

if (jwt) {
  # good to go!
  # proceed with processing this page

  # jwt includes User, Membership, and Org data:
  user_id      = jwt['sub']
  first_name   = jwt['given_name']
  email        = jwt['email']
  account_id   = jwt['orgs'][0]['oid']
  account_name = jwt['orgs'][0]['name']
  permissions  = jwt['orgs'][0]['perm']

} else {
  # token invalid or expired
  session['token'] = null
  redirect user back to LoginRocket
}
Instead of storing the full JWT token in the session or a cookie, you could also extract specific fields from the JWT and store just those in your session.
## /login page

token = request.get_param('token')
jwt_key = "...YOUR_KEY_HERE..."
jwt = JwtLibrary.decode_and_verify_jwt(token, jwt_key, algorithm: 'RS256')
if (jwt) {
  # setup the user's session
  session['user_id']      = jwt['sub']
  session['first_name']   = jwt['given_name']
  session['account_id']   = jwt['orgs'][0]['oid']
  session['account_name'] = jwt['orgs'][0]['name']

  # good to go!
  redirect user to logged-in area
} else {
  # something failed
  redirect user back to LoginRocket
}
See JWT Token Format for details on all the fields available in AuthRocket’s JWTs. There’s also a list of JWT libraries for many languages.
Default Login URL
When a user successfully performs a login or signup (or returns to your app after managing their profile or account), they are redirected back to your app.
By default, users are redirected back to the Default Login URL which can be configured at Realm -> Settings -> Connected Apps.
If users should always arrive at your app (post-login) at the same URL (eg: /login or /manage), the Default Login URL is all you need to configure.
If you want users to be able to arrive at multiple URLs, you’ll want to use LoginRocket’s redirect_uri param.
LoginRocket URLs / redirects
LoginRocket supports a number of URLs for getting back and forth to your app.
At the very least, you’ll likely want to redirect to LoginRocket upon any not-logged-in scenario. You may also want to add links for Signup, Manage Profile, etc.
See LoginRocket URLs and parameters for details.
What’s next
After getting a basic integration, you may want to enable social login, 2FA, email verification, or other features. The good news is no extra code is required—nearly everything is configured directly within AuthRocket.
If you’re stuck, let us know how we can help.